
THIS POST INCLUDES:
——————————————–
1. Using Hands in Reiki
2. Reiki Hand Positions
3. How to remember Reiki Hand Positions
4. Free Download Reiki Hand Positions
USING HANDS IN REIKI
Reiki is traditionally a hands-off therapy where the Reiki practitioner rarely makes any direct physical touch with the client. In some cases, a Reiki practitioner may engage in gentle touch if they believe it helps them to deliver a better prospect of relaxation and calm to their client.
Reiki is so intrinsically based on non-touch that sessions can be undertaken remotely where the practitioner is in a separate location to the client.
Even though Reiki involves non-touch therapy, the Reiki practitioner does use hand movements to move through the process of giving Reiki. The purpose of each hand position is to provide relaxation and balance energy within each area of the body.
The 2 primary methods of using hands within a Reiki treatment are:
1. Direct body touch – where the hands of the Reiki practitioner rest on parts of the client’s body. For example, resting hands over the eyes, on the head, or the shoulders
2. No body touch – this is where the hands of the Reiki practitioner hover over the body and do not physically touch the body.
This process of hand positions serves many functions including:
- A symbolic approach to providing healing practice to the body
- Provides a ritualistic approach to delivering Reiki to a client
- Gives both the Reiki practitioner and client a method of focusing attention on specific areas of the body
- Helps provide a connection for the Reiki practitioner and client when both are engaged in focused attention on the client
- Helps the client connect parts of their body with a feeling of wellbeing
- Develops a protocol for self-treatment
The hand positions should be used as a guide in Reiki practice. Many Reiki practitioners follow a protocol that involves 10 hand positions to hold over the client, however, these positions are a guide only and each treatment protocol should be adapted to the client’s needs in each session. This might mean skipping some hand positions and focusing on others for a longer period than others.
A Reiki practitioner should always remain responsive to what the client needs in the moment and this may entail a deviation away from a ‘typical’ treatment session.
REIKI HAND POSITIONS
To show the hand positions, we’ve included a suggested Reiki self-care treatment taken from the Reiki Guidebook to Self-care. Use this treatment as described or adapt it to suit your needs.
This session should take approximately 20 minutes with each hand position taking approximately 2 minutes each. The time frame should only be used as a guide. In the process of your treatment, you might find a specific area that required more of your attention.
If this is your first time conducting a session like this, take your time and don’t worry about exact hand positioning. Relax and immerse yourself in the process of connecting to your body and the sensations that arise as you change each hand position. Over time you will learn and memorize the hand positions with regular practice.
If there are other parts of your body that you feel would benefit from Reiki, hold your hands in position over those areas as well.
HAND POSITIONS
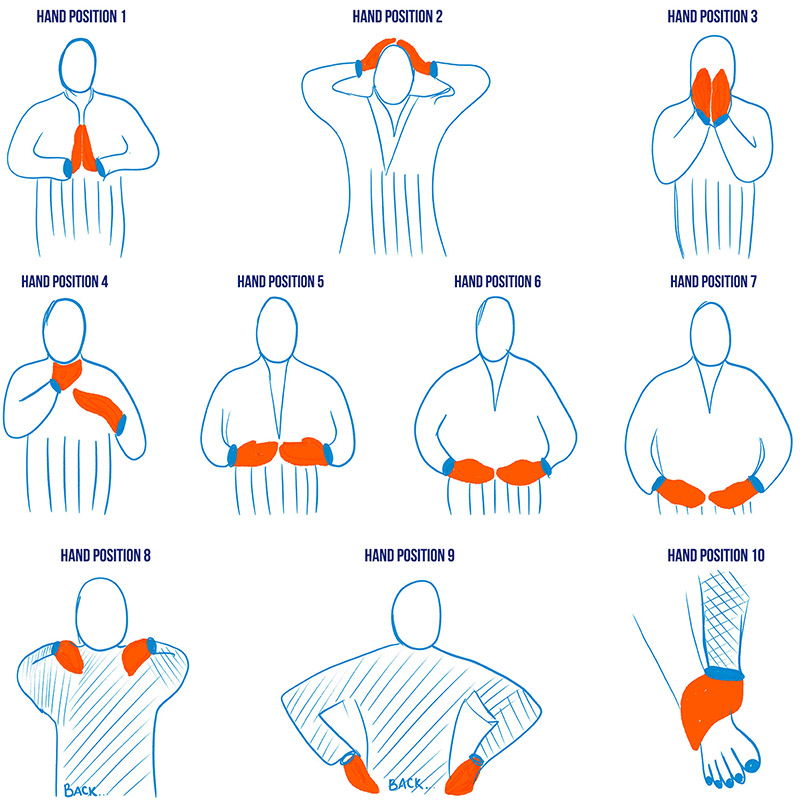
1: Place your hands in a prayer position in the center of your chest, just beneath your chin. Focus on your breathing as you breathe in and out slowly. Breathe slowly to encourage deeper relaxation as you begin your Reiki session.
2: Place both hands on top of the head. Maintain your deep breathing in and out. Focus on the top of your head and begin to relax this area as you feel the connection of your hands to the skin on your head. Feel the muscles relax and all tension leave your head.
3: Place both hands over your eyes. Maintain your slow breathing in and out. Focus on your forehead, eyes, and face. Relax this area as you feel the connection of your hands to the skin on your face. Feel the muscles relax and all tension leave your face.
4: Place your right hand over your throat and your left hand over your heart. Maintain your relaxed breathing in and out. Focus on your hands over your throat and heart. Relax these areas as you feel the connection of your hands to the skin. Feel the muscles relax and all tension leave.
5: Place your hands just below your breast line. Connect your middle fingers from each hand. Maintain your relaxed breathing in and out. Focus on your hands over your chest and ribs. Relax these areas as you feel the connection of your hands to the skin. Feel the muscles relax and all tension leave.
6: Place your hands over your upper stomach and solar plexus area. Maintain your relaxed breathing in and out. Focus on your hands over this area. Relax these areas as you feel the connection of your hands to the skin. Feel the muscles relax and all tension leave.
7: Place your hands over your stomach and navel area. Maintain your relaxed breathing in and out. Focus on your hands over your stomach. Relax these areas as you feel the connection of your hands to the skin. Feel the muscles relax and all tension leave.
8: Place both hands on the shoulder muscles. Maintain your relaxed breathing in and out. Focus on your hands over your shoulders. Relax these areas as you feel the connection of your hands to the skin. Feel the muscles relax and all tension leave your shoulders.
9: Place your hands around your waist and kidney area. Maintain your relaxed breathing in and out. Focus on your hands over this area. Relax as you feel the connection of your hands to the skin. Feel the muscles relax and all tension leave this area.
10: Place your hands on the top of your feet or you may choose to place your hands over the soles of your feet. If covering both feet together is uncomfortable, do this exercise one foot at a time. Do not over stretch or create any tension as this is the opposite of the feeling you are attempting to pursue in this Reiki session. Maintain your relaxed breathing in and out. Focus on your hands over your feet. Relax as you feel the connection of your hands to the skin. Feel the muscles relax and all tension leave your feet.
HOW TO REMEMBER REIKI HAND POSITIONS
Learning the Reiki hand positions is like learning anything new that involves new concepts. In total, there are 10 positions in this flow. As with learning most things, familiarity is the best tool to store new memories.
We all learn differently so you may prefer to use some of your previously successful learning techniques to remember the recommended 10 Reiki hand positions.
Below is a suggested guide on how to remember the Reiki hand positions:
1. Read through all 10 positions.
2. Read through all 10 positions again as you hold your hands in the same positions
3. TEST: Can you remember the first 2 positions yet? If not, then focus on memorizing the first 2 positions – center chest and top of the head
4. Run through the first 4 positions and say them out loud – chest, head, eyes, throat/heart. Run through these positions again using your hands.
These techniques are based on the common learning techniques of spaced repetition and chunking. Spaced repetition is based on the premise of regularly practicing learning new content over time. Chunking is based on breaking down content and reforming it into meaningful groups of information. For example with the 10 hand positions above, you can remember the first 4 hand positions as all occurring above the chest area – chest, head, eyes, throat/heart.
So, using this information, we continue learning:
5. Learn the next 3 positions (chunking) are all around the middle area in the front part of the body – breast line, upper stomach, stomach/navel
6. TEST: Recall the first 4 positions again and say them out loud – chest, head, eyes, throat/heart. Run through these positions again using your hands.
7. TEST: Recall the middle 3 positions again and say them out loud – breast line, upper stomach, stomach/navel. Run through these positions again using your hands.
8. Learn the next 2 positions are on the back of your body – shoulders and waist/kidney area
9. TEST: Recall the first 4 positions, the middle 3 positions, and the back 2 positions.
10. Learn the past position – the feet. Add all 10 positions together.
The above is 10 steps to learning the 10 hand positions. Take a break after your work through the 10 steps. Then come back to see how many you can recall from the 10 hand positions. Repeat the 10 steps if necessary to further cement your memory of the Reiki hand positions.
These hand positions are taken from your product in the store: Reiki Guidebook to Self-care
If you’re interested in ‘learning’ about learning, we can recommend this excellent (FREE) course at Coursera: Learning How to Learn: Powerful mental tools to help you master tough subjects
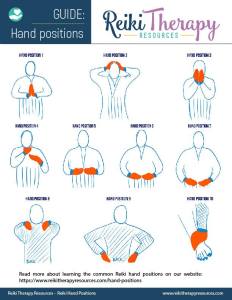
FREE DOWNLOAD
SIGN UP below to receive your FREE DOWNLOAD. Once you enter your email address, you will receive access to the Free Reiki hand positions chart.
BUILD YOUR REIKI REFERENCE MATERIALS:
Pin this image to your Pinterest board.

SHARE KNOWLEDGE & PASS IT ON:
If you’ve enjoyed this post, please share it on Facebook, Twitter, Pinterest. Thank you!