
THIS POST INCLUDES:
——————————————–
1. Why create a Reiki ecourse
2. Choose your Reiki ecourse idea
3. Create your Reiki ecourse
4. Marketing your Reiki ecourse
5. Free Download Ecourse Sales Page Cheatsheet
WHY CREATE A REIKI ECOURSE
As a Reiki practitioner in private practice, your primary source of income may be related to client work, however, it’s also beneficial to diversify your income to help develop additional sources of income through other services and products.
For ideas on how to diversify your income as a Reiki practitioner, you can read our previous blog post: 10 Ways to Increase Your Reiki Income.
One of the ways to generate additional income includes creating an ecourse. Ecourses are provided to students online and allow you the flexibility of delivering your ecourse to potentially thousands of people. Providing ecourses online gives you the opportunity to expand your reach to a global network of customers whereas your individual Reiki client sessions only focus on your local area where you operate your Reiki practice.
An ecourse can be as hands on or off as you prefer. You can choose to guide your students through each section of the ecourse and regularly interact with your students. Alternatively, you can provide an ecourse where students guide themselves through the content in your ecourse. Despite not being as interactive as a guided ecourse, you can still make yourself accessible to students through email, Q&A sessions, and regular announcements.
In addition to being a good method of generating additional income, ecourses can also be an effective way to promote your Reiki practice. If you use your ecourse as a marketing tool, you can then choose to charge money for your ecourse or provide it for free as a strategy to generate interest in your Reiki practice for future products and services that you may want to sell as part of your Reiki practice.
CHOOSE YOUR REIKI ECOURSE IDEA
Your first major decision will be deciding the topic of your ecourse. Your ecourse topic should be something you are interested in and that you have the skills to teach. Your ecourse idea should also be something your potential students are interested in learning more about. This may relate to helping your students build their own skills, explore an area of interest, or solve a personal problem they are looking for help for.
If you already have a list f email subscribers or a following on social media, you can request feedback from your followers on the topics they would like to learn about from you. If you have an ecourse topic in mind, then you can contact your readers to seek clarification on the aspects of that topic that your potential students may be interested in learning more about.
For example you may know that you want to run an ecourse on Reiki, however, after feedback from your subscribers and followers, you may learn that potential students are interested in learning how to use Reiki within their family, or how to incorporate Reiki into a self-care program.
If you don’t have an established audience that you can seek feedback from, you can seek opinions from online forums about your topic (Facebook groups, Reddit etc) where people discuss your topic and related areas.
To help you further define your topic, ask yourself these questions:
- Who is your potential student?
- Why do you want to help the students who take your ecourse?
- What is the number one challenge your potential student is facing that you can address in an ecourse?
If you are a member of any Facebook groups, Reddit sub-reddits, or other online message boards, review the most posted topics that relate to your topic idea.
Use online forums, social media, and discussions with current clients to help define your ecourse topic. Your ecourse should:
- Fall under your area of knowledge
- Help your clients
- Be teachable in an online ecourse format
- Meet your ethical obligations within the confines of the wellness and health industry
CREATE YOUR REIKI ECOURSE
Once you’ve decided on your ecourse topic it’s time to create your ecourse.
BRAIN DUMP
The best approach to starting your ecourse planning is to do a brain dump. To do a brain dump, take a blank piece of paper and write down everything that comes to mind when you think about your ecourse topic.
At this stage, don’t worry about editing your ideas and coming up with the final idea. This brain dump stage is where you let yourself brainstorm any potential ideas that come to mind as your first instinct. At a later stage you can edit your ideas based on more pragmatic strategies and begin to develop the structure of your ecourse.
You can see ideas from external sources to help inspire your brain dump of ideas. Amazon can be a valuable resource for idea inspiration by perusing the contents chapters of books that focus on your topic. You can use the ideas from external sources to help fill in any gaps you may have missed in your original brain dump.
STRUCTURE CONTENT
Once you have completed your brain dump, you can begin to define your ideas into a more structured process of content. Start to identify the core ideas about your topic and these cor ideas to develop the individual modules within your ecourse.
The length of your ecourse will define the number of modules that you create. Your ecourse should be short enough to ensure that your students have a high success rate of completing the course, yet long enough to provide your students with a useful level of understanding about the topic.
If you find your ecourse has about 10-20 core ideas that could be developed into separate modules, then you may have too much content for one ecourse and instead my want to develop multiple ecourses. For example you could have:
- Reiki and Self-Care Ecourse 1
- Reiki and Self-Care Ecourse 2
- Reiki and Self-Care Ecourse 3
You could then provide these ecourses one after each other or over the course of a year.
Splitting your ecourse into smaller ecourses has a number of benefits:
- Your students can consume smaller amounts of content over a shorter period of time commitment
- You can use multiple ecourses to develop more detailed content
- Multiple ecourses provides you with ongoing income over time
- You can bundle all ecourses and offer a discount to purchasers
Once you have your core ideas for your ecourse, you should then focus on creating the outline for each module. You can create each module as one single lesson, or you could create sub-units within each module to identify content separately.
By splitting each core topic into smaller units, you can improve the likelihood of your students successfully completing your ecourse. A common guide is to create about 2-4 sub-units within each module. As you complete each module and sub-unit within your ecourse, provide your student with a summary of the most important ideas to learn within that section.
You can help your students retain more information from your ecourse by including opportunities to review information at the end of each section through the use of:
- Worksheets
- Quizzes
- Exercises
TOOLS TO USE FOR THE PLANNING PROCESS:
TYPES OF CONTENT TO INCLUDE IN AN ECOURSE
You may provide your ecourse using a main source of media such as video, however, you may wish to provide supplementary material, such as pdfs, that your students can download and use for later review.
The common types of content to include in an ecourse are listed below. Your ecourse will benefit from including a mix of a variety of types of content because people have different learning methods. These different media methods include visual, audio, and written. Reflect on the demographics of your audience and determine what types of content would suit your audience.
LISTS (usually one page summaries)
- quick tips
- cheat sheet
- flow chart
- reference sheet
- glossary of terms
- checklist
- forms
GUIDES (usually mini-books)
- quick start guide
- tutorial
- Planners
INFORMATION WORKSHEETS
- case studies
- statistics
- templates
- spreadsheets
AUDIO/VIDEO
- Presentations
- Slideshows
- Screenshare tutorials
- Lectures
- Interviews
CREATE YOUR ECOURSE CONTENT
Once you have decided on your ecourse structure and the types of content you will include in your ecourse, you can begin to create your documents, videos, audio, and visual aids.
This can be an overwhelming process for many who may be new to developing ecourses. To reduce the difficulties you may experience in this process, it’s useful to develop some guidelines of the amount of content to create. From your initial guideline, you can expand or reduce your content once you start creating.
An example of how you could structure your content is listed below:
NOTE: Assume your ecourse has 4 modules and 4 sub-units within each module.
MODULE 1
- Unit 1 – 500 words
- Unit 2 – 500 words
- Unit 3 – 500 words
- Unit 4 – 500 words
- Module handout
MODULE 2
- Unit 1 – 500 words
- Unit 2 – 500 words
- Unit 3 – 500 words
- Unit 4 – 500 words
- Module handout
MODULE 3
- Unit 1 – 500 words
- Unit 2 – 500 words
- Unit 3 – 500 words
- Unit 4 – 500 words
- Module handout
MODULE 4
- Unit 1 – 500 words
- Unit 2 – 500 words
- Unit 3 – 500 words
- Unit 4 – 500 words
- Module handout
This guideline would be an initial plan to help your start creating content. Having this guideline will help keep you focused on developing your topic into helpful modules for your student to progressively work through.
As you create each module you may find situations where you need to provide additional resources such as images, audio, or video files.
The above sample ecourse structure would result in 8000 words of content over 4 main topics and 16 sub-units. Not all of your modules will have the same number of sub-units and resources.
Your guideline should help get your started in your content creation process but also remain flexible as you develop your content. This initial plan will help you decide how to plan your time so that you can create your content and complete your ecourse.
MARKETING YOUR REIKI ECOURSE
Marketing your ecourse can be done in a variety of ways. You can make your ecourse available for purchase on your website at any time. You then email your mailing list and market your course via social media or advertising telling your potential students that your ecourse is available for purchase at any time.
Alternatively you can employ a more complex marketing strategy where you limit the promotional period of your ecourse. This stragetgy involves building anticipation of your ecourse through blog posts, social media sneak peeks, and email previews. This extended marketing strategy helps to develop an interest for your potential students about your ecourse.
EDUCATING YOUR ECOURSE STUDENTS
If you market your ecourse over an extended period of time to your potential students, you can use a number of strategies focusing on when you communicate with your potential students.
If your potential students only recently learned about your Reiki practice online and have not had any direct contact with you they may not be aware of your skills and your approach to helping people.
In the lead up to your ecourse launch, it is a good opportunity to introduce yourself to your potential students and educate them about how you can help them.
Some common ways you can educate potential ecourse students about you and your ecourse includes:
- Tips and tricks download
- Checklists
- Worksheets
- Educational eguide
- Email mini course series
The type of strategy that you use should relate to the topic of your ecourse so that you are showing your potential students your knowledge about the topic and how you can help them. Your promotional material will also give your potential students an insight into your teaching style and the type of content that will be included in the ecourse.
The marketing methods you provide should always be free to your readers. You should also require that your readers provide an email address to enable them to download the free resources that you provide in your marketing strategy. As you are educating your potential ecourse students about you and your ecourse topic, you are also collecting email addresses that you can eventually communicate to about your ecourse when it launches.
Need help with creating your ecourse?
If you need help to create your ecourse, we provide an Ecourse Planner Package in the store.
You can purchase the package in a variety of different formats including:
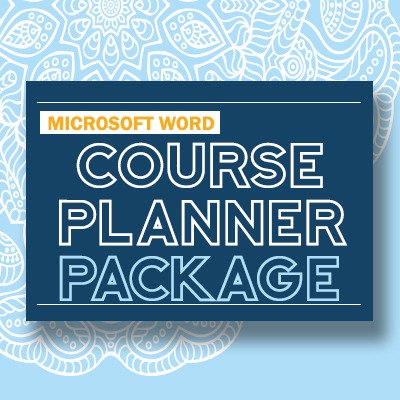


This course package contains the necessary steps you will need to take to create your next course or workshop.
Online courses and workshops are an excellent way to create alternative income for your Reiki therapy business. They are also a great way to build awareness about your Reiki business. This can be achieved by offering a free short-term course such as a 3-day challenge.
If you’ve considered creating a course before but it seemed too much work for an unexpected outcome, then this package will provide you with many templates and checklists that will help reduce the amount of time it takes to create your course.
Creating a course can be overwhelming from the initial stages of outlining your course structure, to creating the course content, and finally effectively marketing your course to achieve sales.
This course planner package will provide you with a roadmap on how to complete your course from brainstorming your course topic, through to creating your course content and then launching your course online or in person.
The course planner package provides detailed information on how to complete the necessary steps to launch your course.
——————————————————————————————————————–
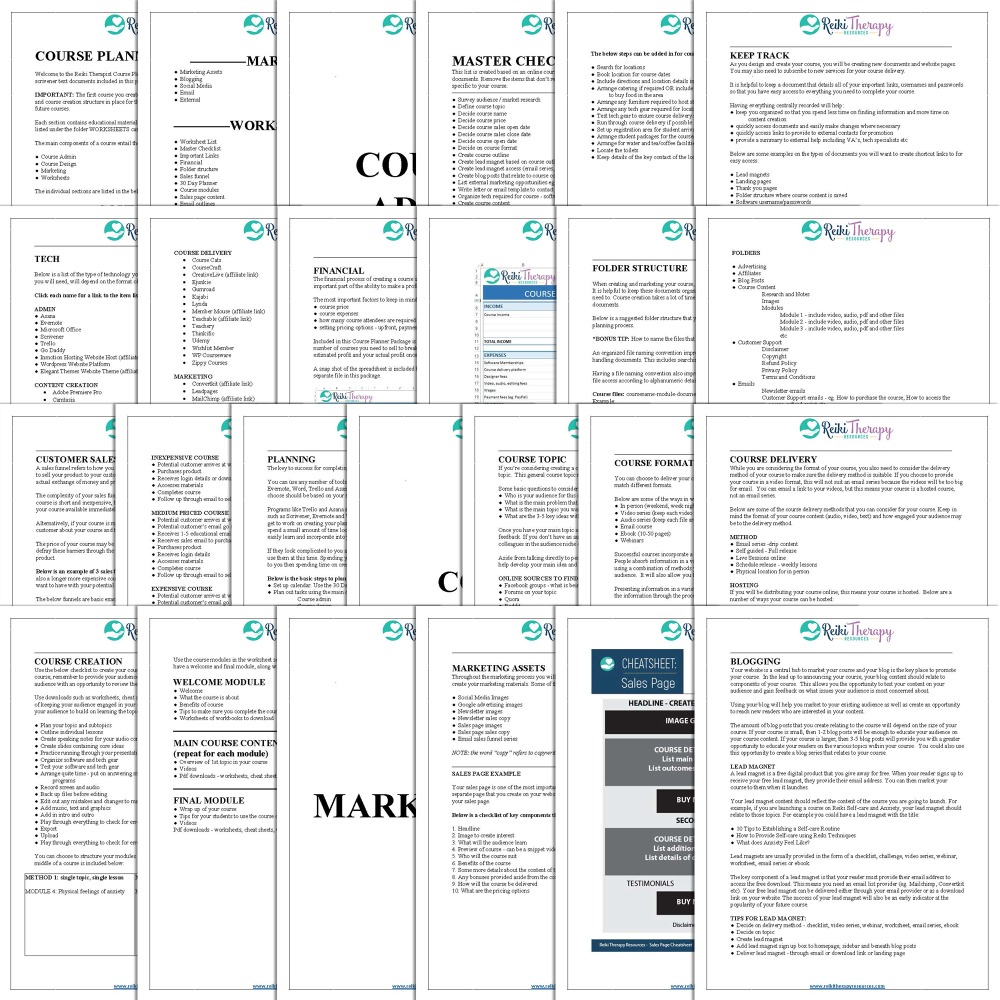
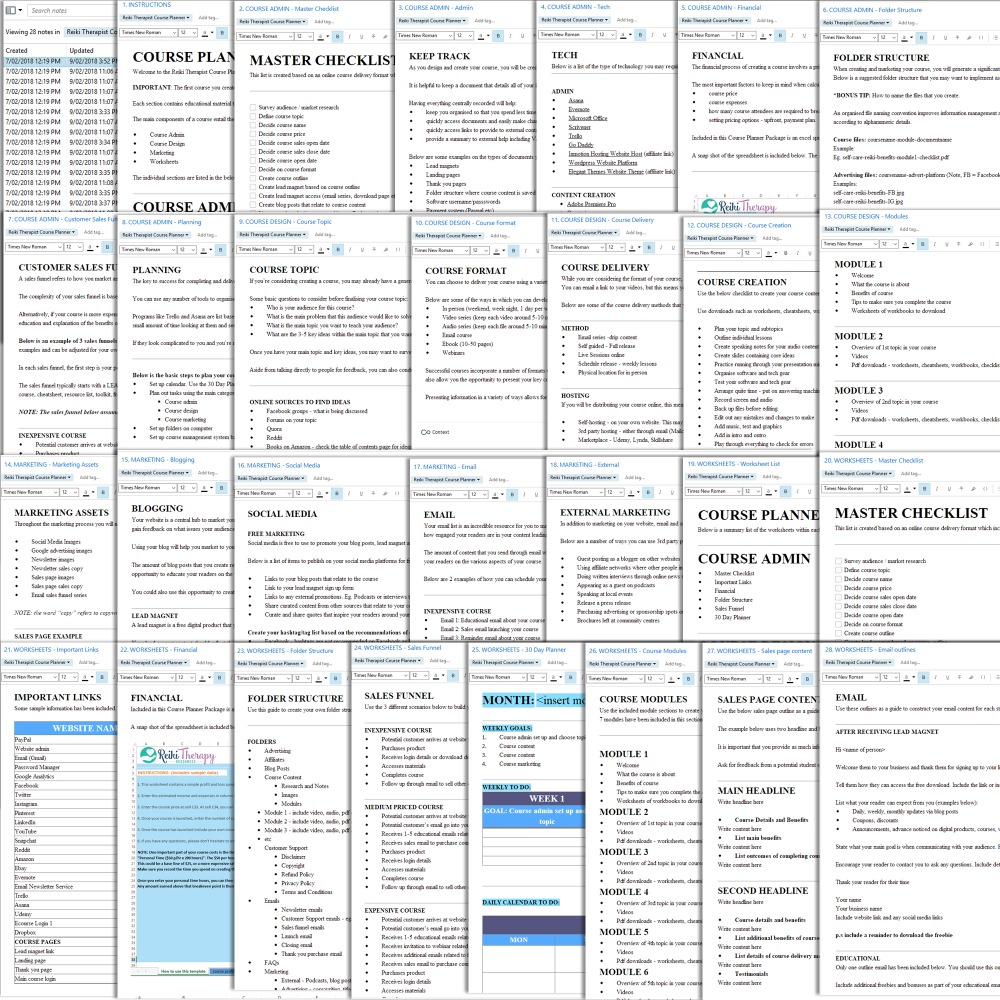
The package includes 4 major sections:
- Course Admin – the course admin section will help establish the administrative foundation to support your course creation process. Putting the foundational admin structure in place will help increase your productivity and efficiency in creating your course.
- Course Design – this section will help make the core decisions about your course topic, course format, and course delivery method. You will also learn about creating your course content in modules.
- Marketing – after your course content is completed, you then need to market your course. This section contains specific details about the strategy and marketing assets you will need, as well as implementing sales funnels to sell your course.
- Worksheets – These course planner worksheets provide you with the necessary steps to complete your course.
The resources in this package will make the process of creating your course much easier and quicker and help remove the mental obstacles and distractions that prevent you from getting things done!
This course planner package will save wasted time by helping you organise, create and effectively market your course for your Reiki business.
This course planner package will provide you with a clear direction to get your course completed.
The course planner package includes actionable worksheets and checklists to get your course completed!
——————————————————————————————————————–
After working through this package you will:
- Have a step by step project plan to create your next course
- Centralize all of your course assets to enable easy updating
- Select tech gear to create your course and 3rd party platforms to host your course
- Create an effective customer sales funnel to sell your course
- Construct your sales emails using the included email templates
- Decide on your course topic, course format and course delivery method
- Create your course using the module template provided
- Create the marketing assets you will need to market your course
- Create a blogging strategy to market your course
- Use the 30 day planner to complete your course
——————————————————————————————————————–
The contents of this package include the following sections:
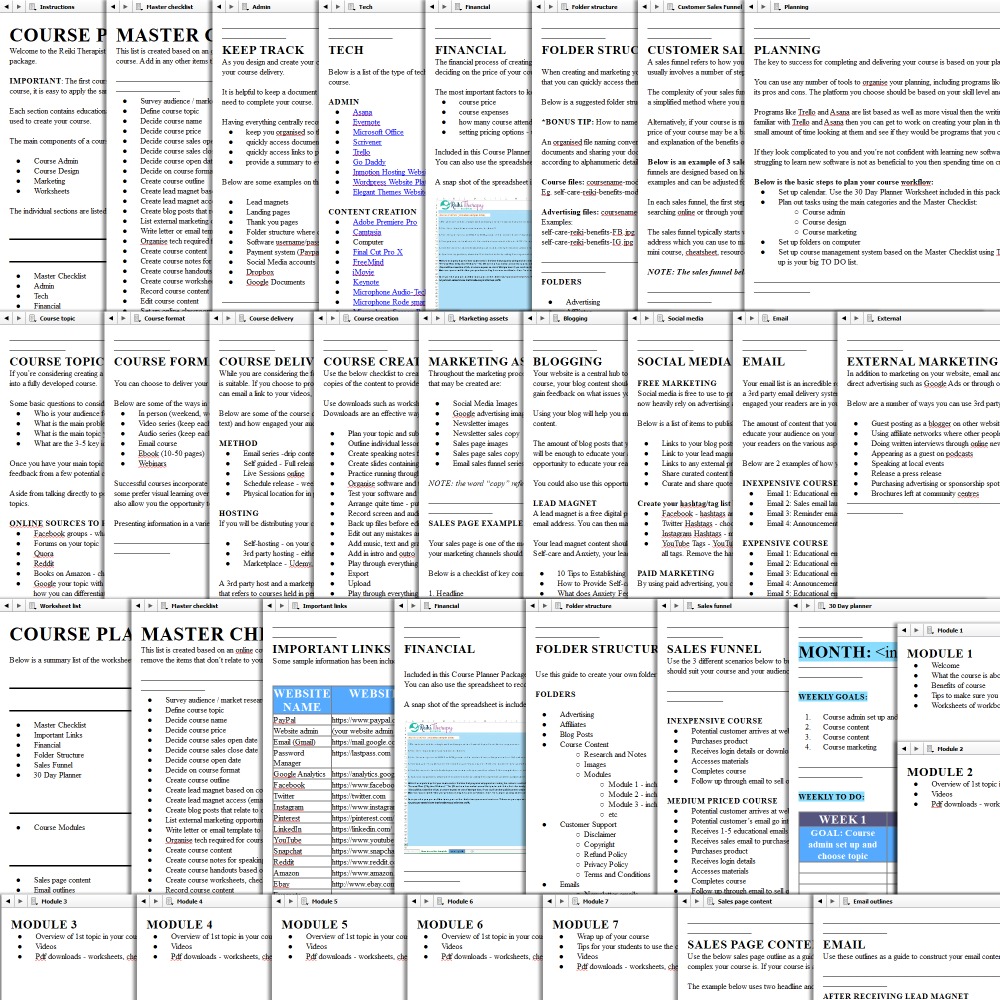
COURSE ADMIN
- Master Checklist
- Admin
- Tech
- Financial
- Folder Structure
- Planning
- Customer Sales Funnel
COURSE DESIGN
- Course Topic
- Course Format
- Course Delivery
- Course Creation
MARKETING
- Marketing Assets
- Blogging
- Social Media
- External
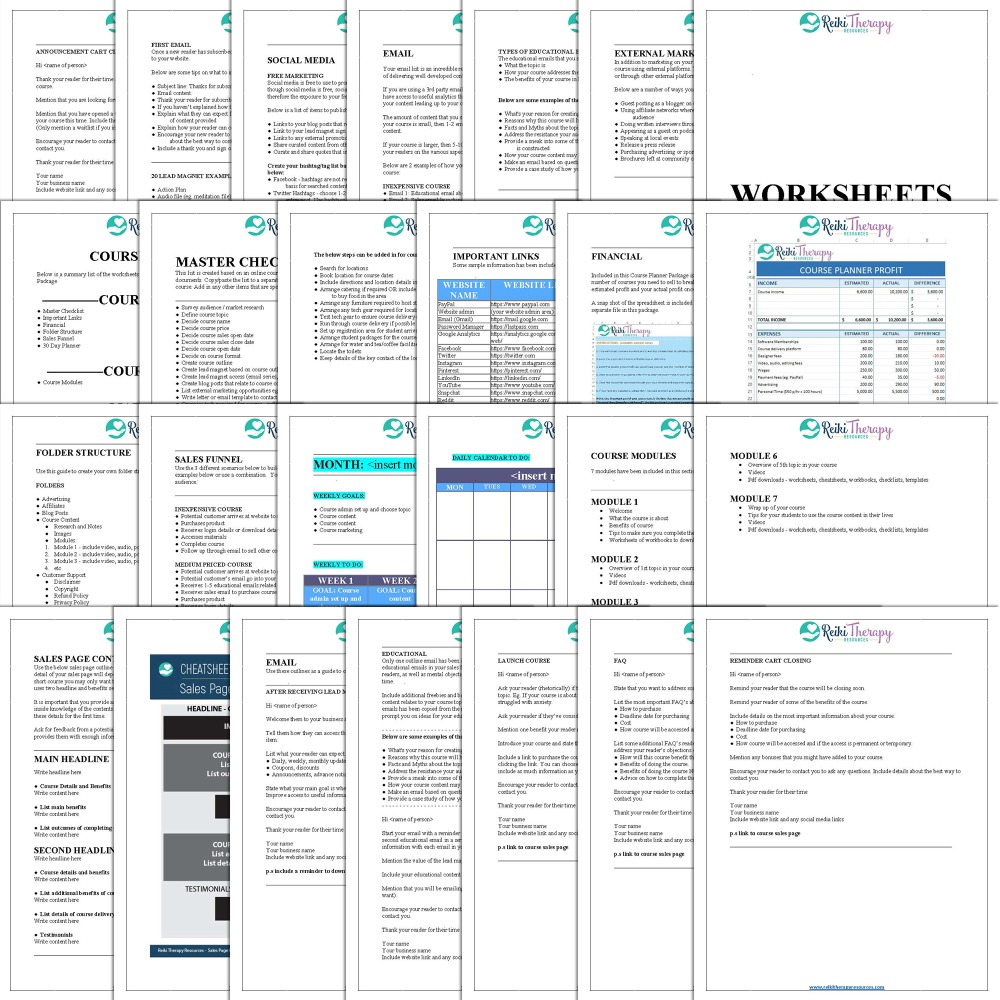
WORKSHEETS
- Worksheet List
- Master Checklist
- Important Links
- Financial
- Folder structure
- Sales funnel
- 30 Day Planner
- Course modules
- Sales page content
- Email outlines
——————————————————————————————————————–
Below is a breakdown of the individual sections within each major category in this package.
COURSE ADMIN
Master Checklist
The master checklist contains the necessary steps to complete your course. It also includes an additional checklist of things to do for an in-person workshop.
Admin
It’s important to centralise the administration of your most important documents and files used to create your course including lead magnets, sales pages, your folder structure, software, payment system access, and policy documents.
Tech
Use our comprehensive list of tech gear including administration tools as well as content creation, course delivery and marketing tools and software.
Financial
Included in this Course Planner Package is an excel spreadsheet that you can use to calculate the number of courses you need to sell to breakeven. You can also use the spreadsheet to record your estimated profit and your actual profit once your course has been completed.
Folder Structure
Included in the Course Planner Package is a suggested folder structure to help keep your documents organised for quick access. We’ve also included a file naming template to help you improve your information management process.
Customer Sales Funnel
A sales funnel helps you craft your marketing message to your audience. Included in the Course Planner Package is 3 different sales funnels and the steps involved to market your course.
Planning
Included are the basic steps to plan your course workflow, including suggested programs to use to set up your course management system.
——————————————————————————
COURSE DESIGN
Course Topic
Included in this section are the questions you need to consider before finalising your course topic. Also included is a list of online sources to help consolidate your course topic ideas.
Course Format
You can choose to deliver your course using a variety of different formats. You can also mix and match different formats. Included is some suggestions on how to structure your course format.
Course Delivery
This package will help you decide on your course delivery method including suggestions on how to host your course online.
Course Creation
Use the provided checklist to create your course content. Use the module templates as a guide on what content to include in each module. Included are 2 examples of a module structure including a single lesson and multiple lessons.
——————————————————————————
MARKETING
Marketing Assets
Throughout the marketing process, you will need to create many documents, files and images to create your marketing materials. Included is a list of the common items you will need to market your course. Also included is a sales page example layout and a checklist of key components that should appear on your sales page.
Blogging
Your website is a central hub to market your course and your blog is the key place to promote your course. Included are details about creating your necessary lead magnet along with a list of 20 Lead Magnets you can use for your course.
Social Media
In this package is a simplified list of the items you should be publishing on your social media platforms while launching your course. Included are important tips about creating a hashtag/tag list to help boost the visibility of your course.
Email
Included are 2 examples of how you can schedule your email content based on your course structure. Learn about the educational emails you should include in your email content, including some useful examples of specific educational emails you can write.
External
In the Course Planner Package, you will find details about where to market your course externally.
——————————————————————————
WORKSHEETS
Worksheet List
This is a summary list of the worksheets available to use in your Course Planner Package.
Master Checklist
The master checklist contains the necessary steps to complete your course. It also includes an additional checklist of things to do for an in-person workshop.
Important Links
Use this template to record your important links used in your course including payment systems, course pages, social media, course management software, marketing links and more.
Financial
Use this excel spreadsheet to calculate the number of courses you need to sell to breakeven. You can also use the spreadsheet to record your estimated profit and your actual profit once your course has been completed.
Folder Structure
Use the suggested folder structure to help keep your documents organised for quick access. Also included is a file naming template to help you improve your information management process.
Sales Funnel
Use the 3 different scenarios below to build your ideal sales funnel. You can use one of the examples below or use a combination. Your sales funnel should suit your course and your audience.
30 Day Planner
Use this 30 Day Planner to set weekly and daily to-do’s to get your course completed. Included is the 4 main goals you will need for each course you create.
Course Modules
Use the module templates as a guide on what content to include in each module, including your welcome module and final summary module.
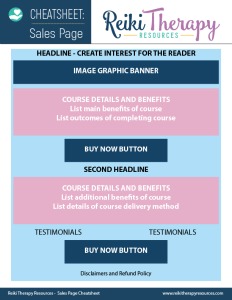
Sales Page Content
Use the sales page layout graphic as a guide to create your sales page. Also included is a template to craft your headlines, details and benefits and overall sales page structure.
Email Outlines
Use these outlines as a guide to construct your email content for each step in your sales funnel. Includes 6 email outlines that are necessary for your course launch.
FREE DOWNLOAD
SIGN UP below to receive your FREE DOWNLOAD. Once you enter your email address, you will receive access to the Free Ecourse Sales Page Cheat sheet.
This cheat sheet provides you with a suggested layout of an effective sales page to include on your website to sell your ecourse. This sales page cheat sheet is designed to walk your potential student through your ecourse outline.
This sales page cheatsheet is taken from the Course Planner Package that is available in the store for purchase.
BUILD YOUR REIKI REFERENCE MATERIALS:
Pin this image to your Pinterest board.

SHARE KNOWLEDGE & PASS IT ON:
If you’ve enjoyed this post, please share it on Facebook, Twitter, Pinterest. Thank you!